Contents
After a video post is imported into WordPress, Vimeotheque won’t interact with it anymore, except for embedding the video into the post. This can be modified by using the After import options available into the plugin Settings page.
After import options menu location
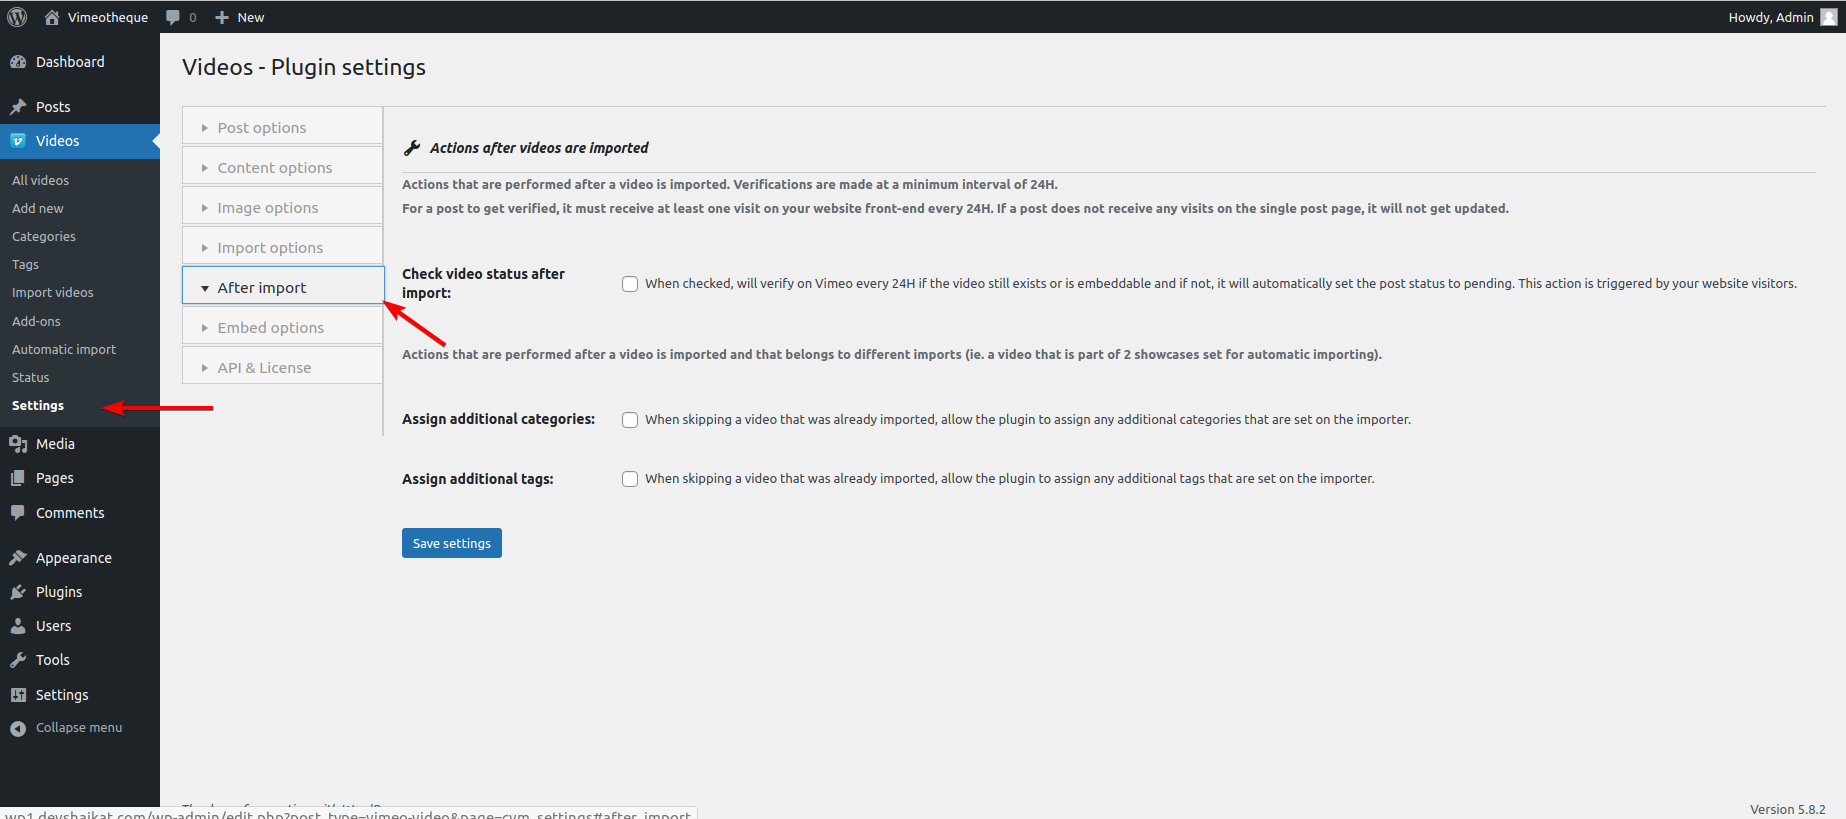
To find the import options you need to click on Videos – Settings from the WordPress dashboard and click on After import tab.
After import options are used to perform actions on the videos once they are imported. Understanding these options will help you a lot if you are using the automatic import feature of Vimeotheque Pro.
The after import options
There are several options that can be set up to customize the after import process.
Check video status after import
When enabled, this option will check if the video is still available and embeddable. If the video is deleted or removed by the owner or is not embeddable then the plugin sets the post status pending and waits for a manual review by the website admin.
The checking process runs every 24 hours and is triggered when anyone visits a the single video post imported by Vimeotheque that has exceeded the 24 hours checking time span. The single post checking is useful because it will update only the video posts that your visitors have shown interest for.

When you enable the Check video status after import option, you will see three more options showing up in relation with this option: update post title, update post content and update post tags.
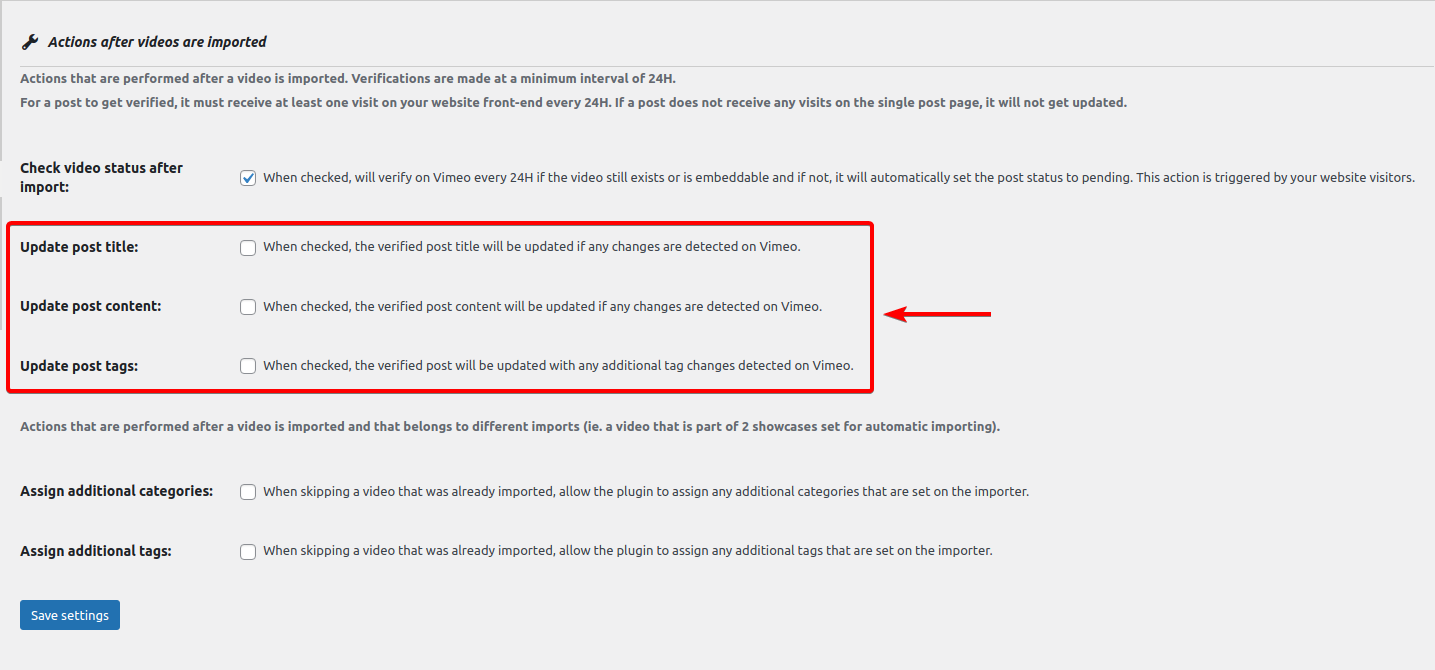
Update post title
Enabling this option will check whether the owner of the video made any changes to the video title on the Vimeo website and will import the changes into WordPress by modifying the post title with the new title retrieved from Vimeo.
Update post content
Similar to the previous option, this option it will check whether the owner of the video made any changes to the video content on the Vimeo website and will modify the post content with the content retrieved from the Vimeo website. Any changes you made to the post will be lost.
Update post tags
Finally, the post tags update option will check whether the owner of the video made any changes to the video tags on the Vimeo website and will import any additional tags that were created. This won’t create duplicate tags, existing tags will be kept and the new ones will be assigned to the post.
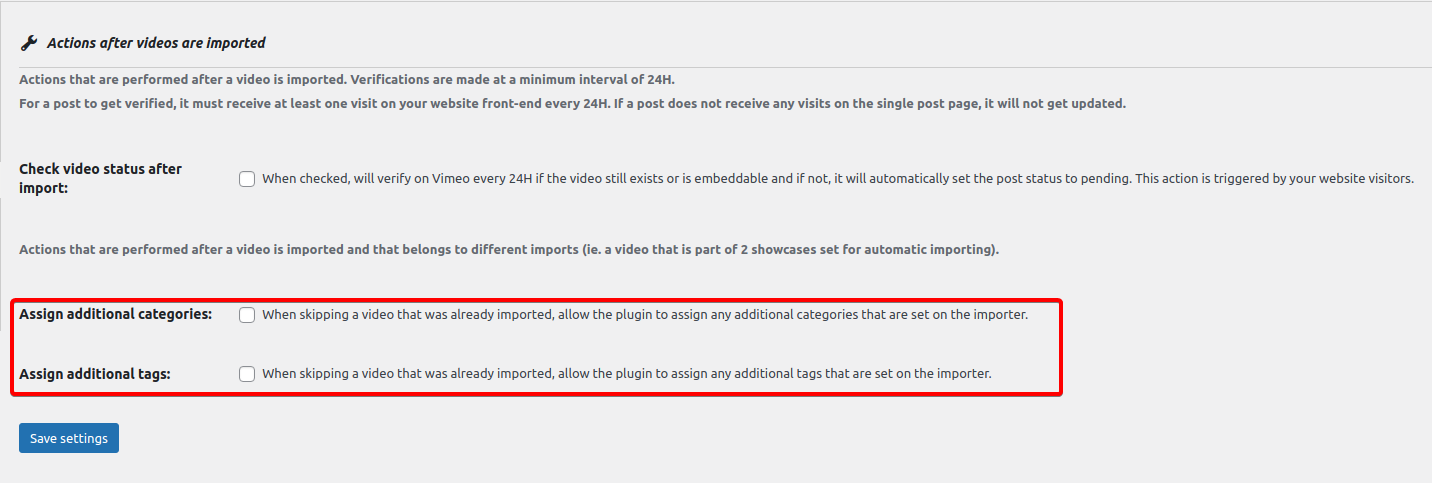
Assign additional categories and Assign additional tags
The last two options of After Import are Assign additional categories and Assign additional tags. They are used to set the category and tags when a duplicate post is detected when trying to import videos from Vimeo.
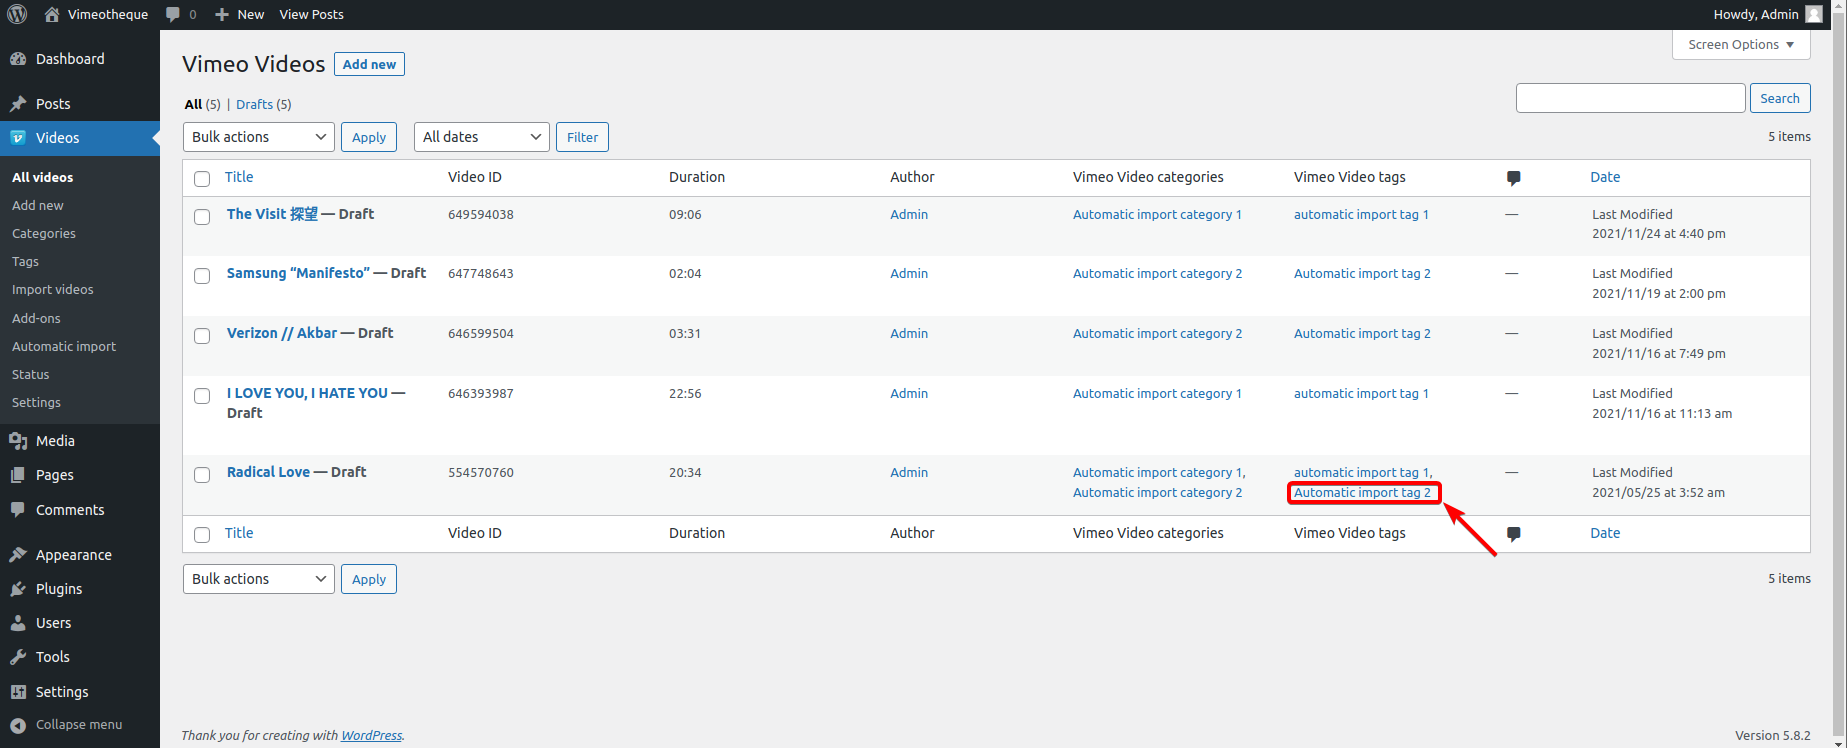
To make things easier to understand, we will use an example. Let’s assume we have two automatic imports: Automatic import 1 and Automatic import 2.
Example of additional categories and tags assignment
Automatic import 1 has imported a showcase and this showcase has video1, video2, and video3. The automatic import is assigned to the category automatic import category 1 and the tag is automatic import tag 1.
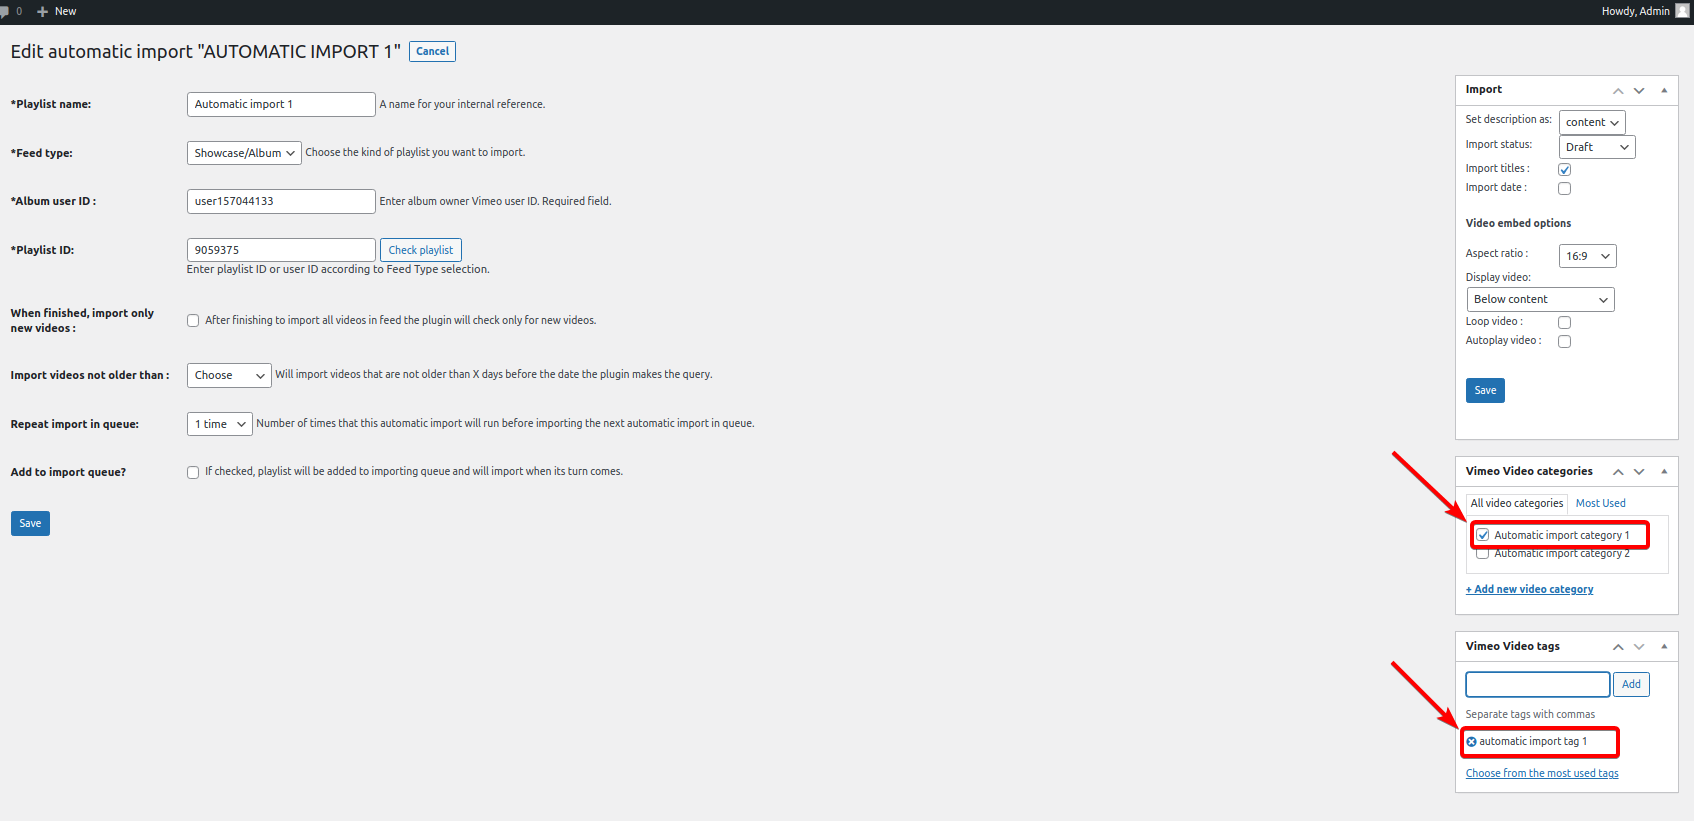
Next, we have a second automatic import called Automatic import 2, which imports a second showcase containing videos video3, video4 and video5. This automatic import assigns videos to category automatic import category 2 and to tag automatic import tag 2.

As you can see, Automatic import 1 has imported 3 videos while Automatic import 2 has processed 3 videos, skipped 1, and imported only 2 videos because one of the videos is already imported by Automatic import 1.
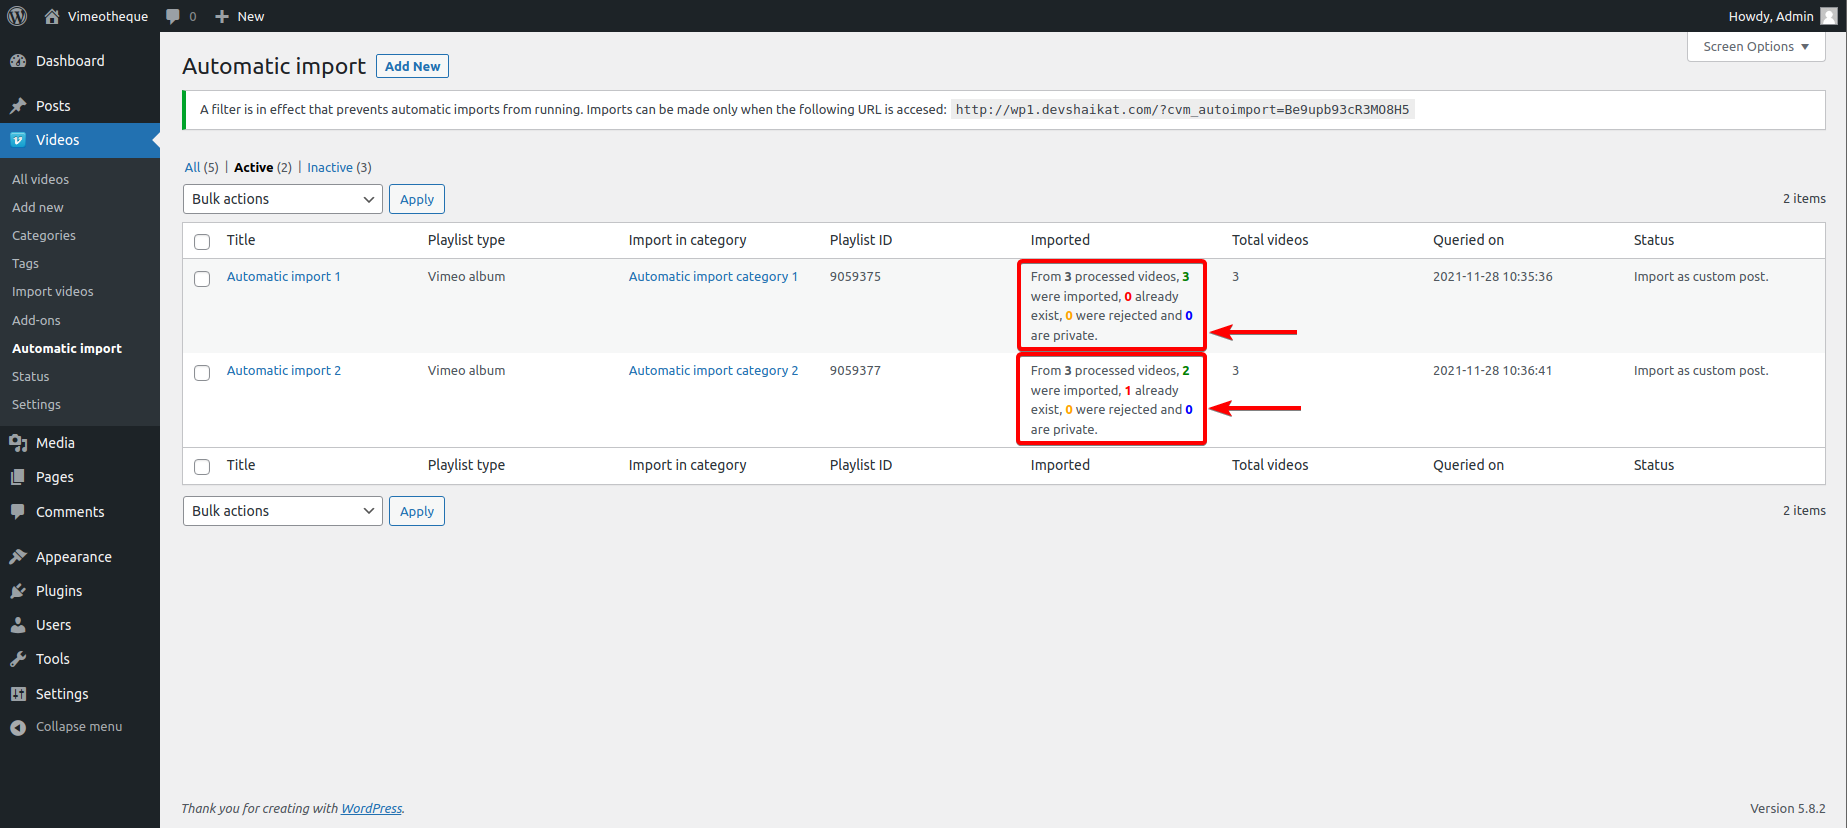
If option Assign additional categories is enabled, when Automatic import 2 runs and skips video3, it will assign the categories from the Automatic import 2 along with any already assigned categories for this post.

In a similar fashion, if Assign additional tags is enabled, Vimeotheque will assign the tags from Automatic import 2 to the video post along with any other existing tags.