With the release of Vimeotheque PRO 2, when upgrading from a previous PRO version lower than 2.0, some extra steps will be necessary.
Depending on your option, you can update either by uploading the update by FTP/SFTP or directly from the WordPress administration.
Both methods will be described below, please follow the steps of the method that suits you best.
Updating from WordPress back-end
Updating automatically from WordPress is a 2 steps process:
- update from Vimeotheque 1.6.x to Vimeotheque 1.7 to ensure all dependencies are met;
- update from Vimeotheque 1.7 to Vimeotheque 2.
1. If the update to 1.7 isn’t shown in Plugins page, go to the Updates page and check for updates.
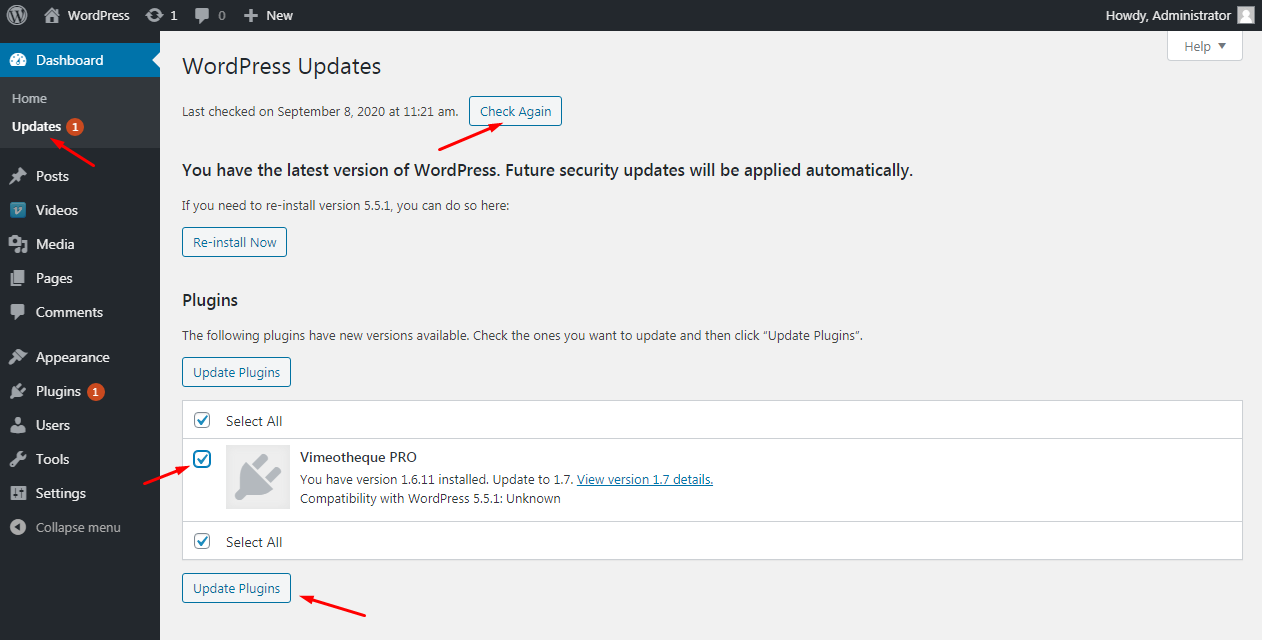
2. Update to Vimeotheque 1.7
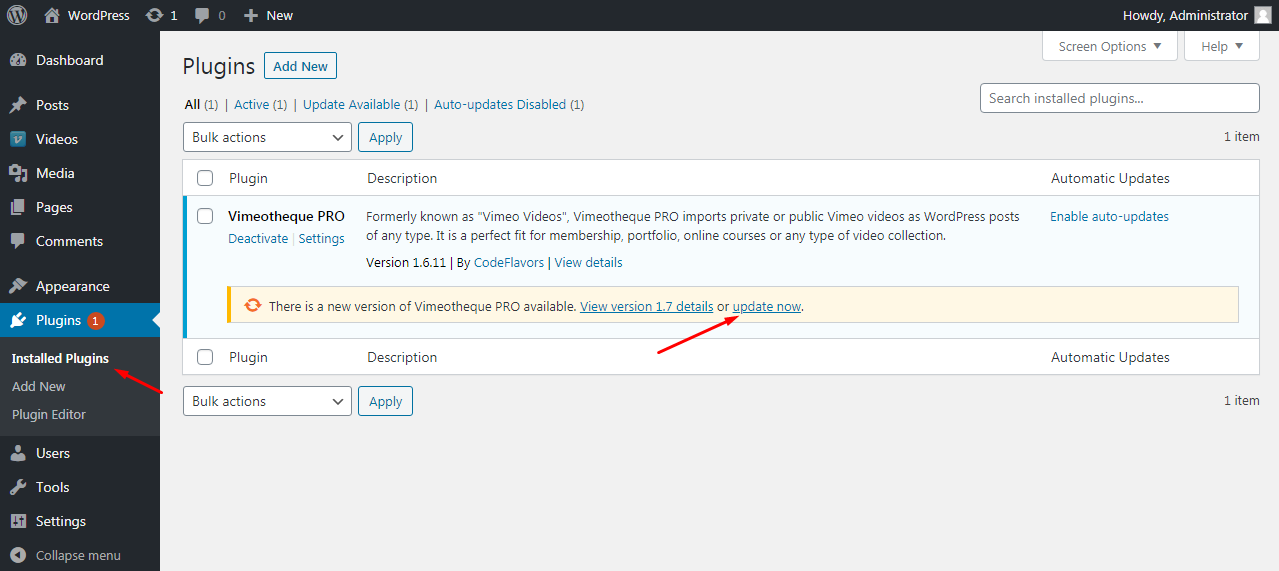
3. After updating to Vimeotheque 1.7, you will notice several messages telling you to install Vimeotheque Lite 2.0. Click the installation link from those messages and install Vimeotheque Lite 2 but do not activate it yet.
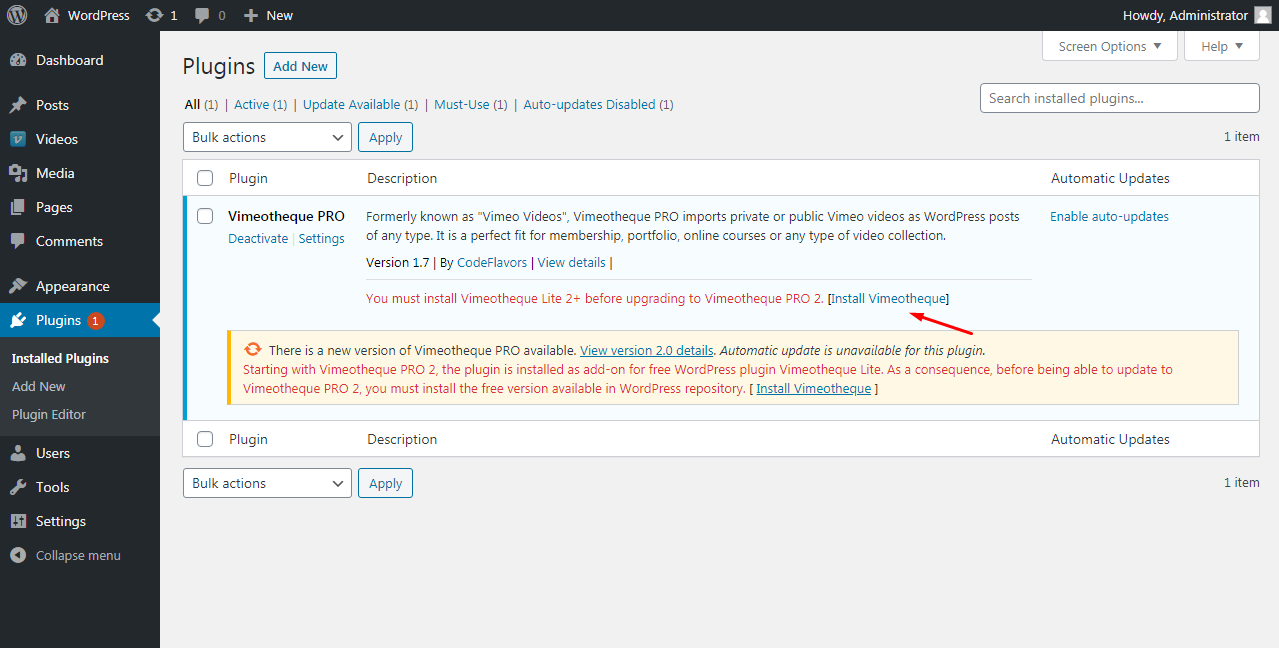
3.1. You can also check the “Upgrade to 2.0” page and make sure all requests are checked.
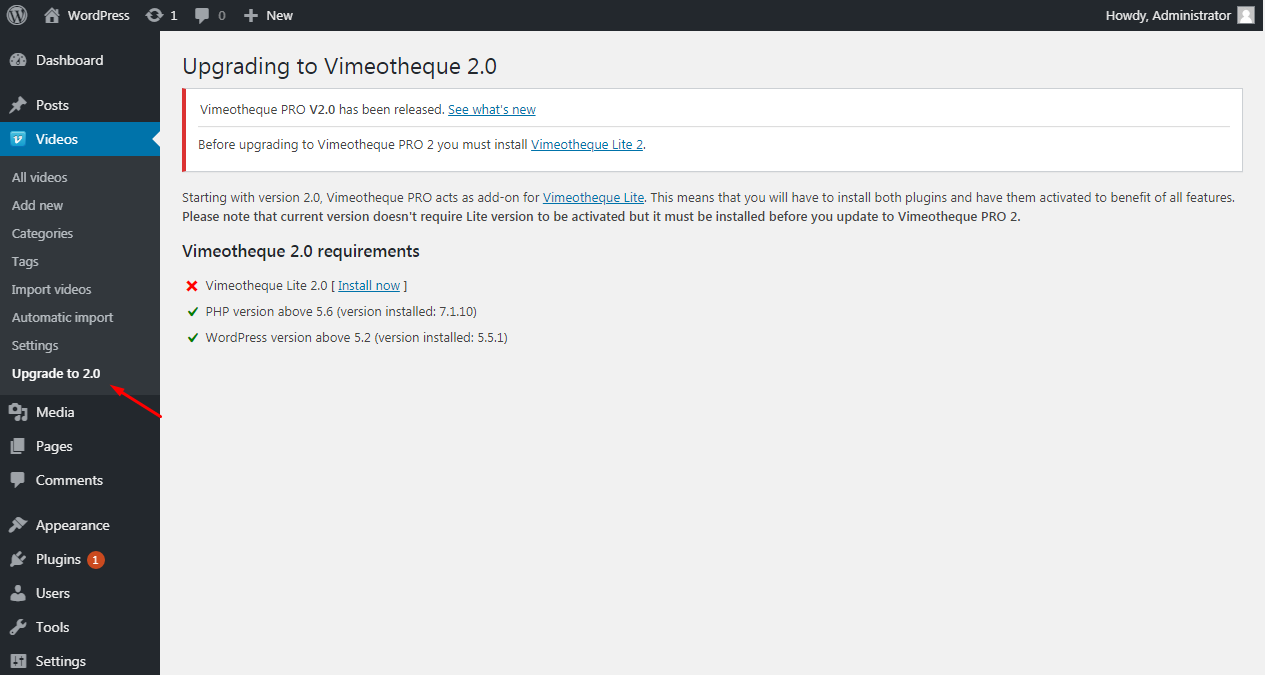
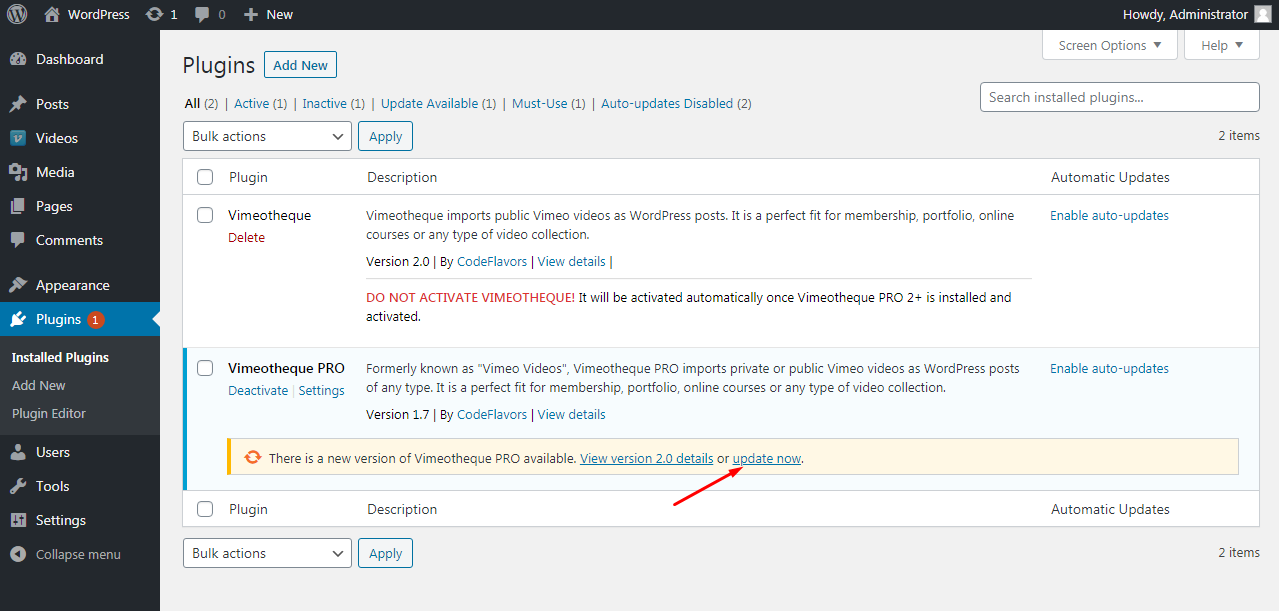
4. You should now see the update message for Vimeotheque PRO 2.0. If you don’t, go to Updates page and check for updates.
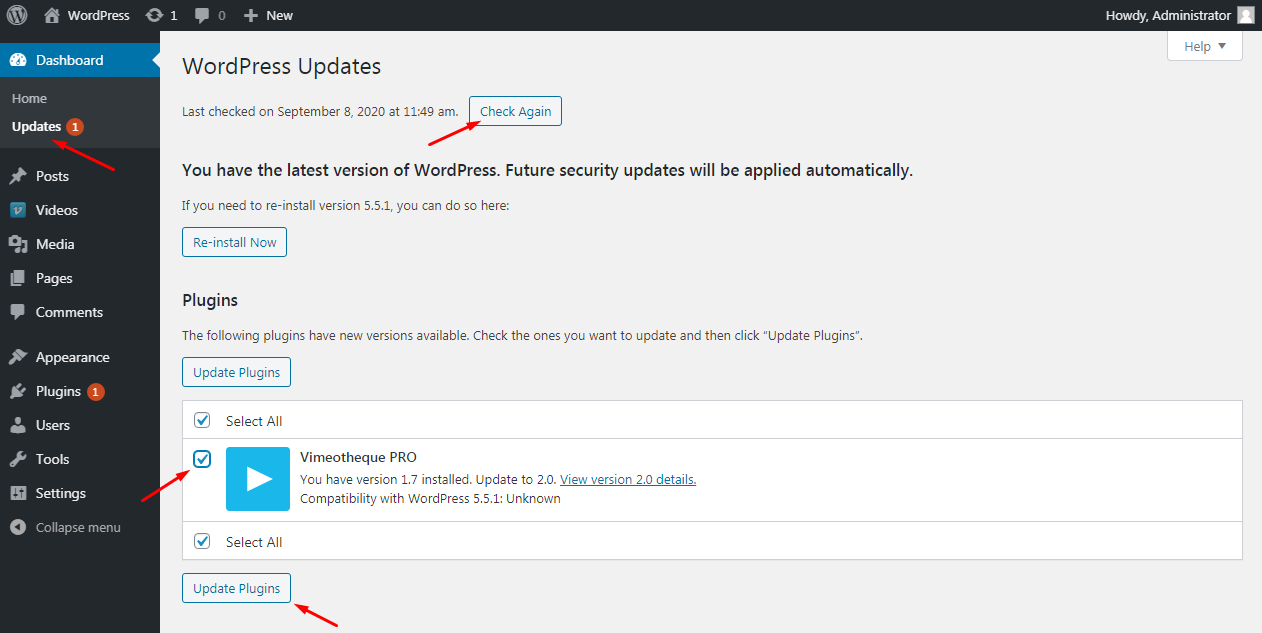
5. Update to Vimeotheque PRO 2.0; after the update is finished, PRO version will automatically activate Vimeotheque Lite 2.
Manual update by FTP/SFTP upload
1. Go to Vimeotheque Lite 2 page on WordPress repository and download the free version of the plugin.
2. From your account, download Vimeotheque PRO 2.
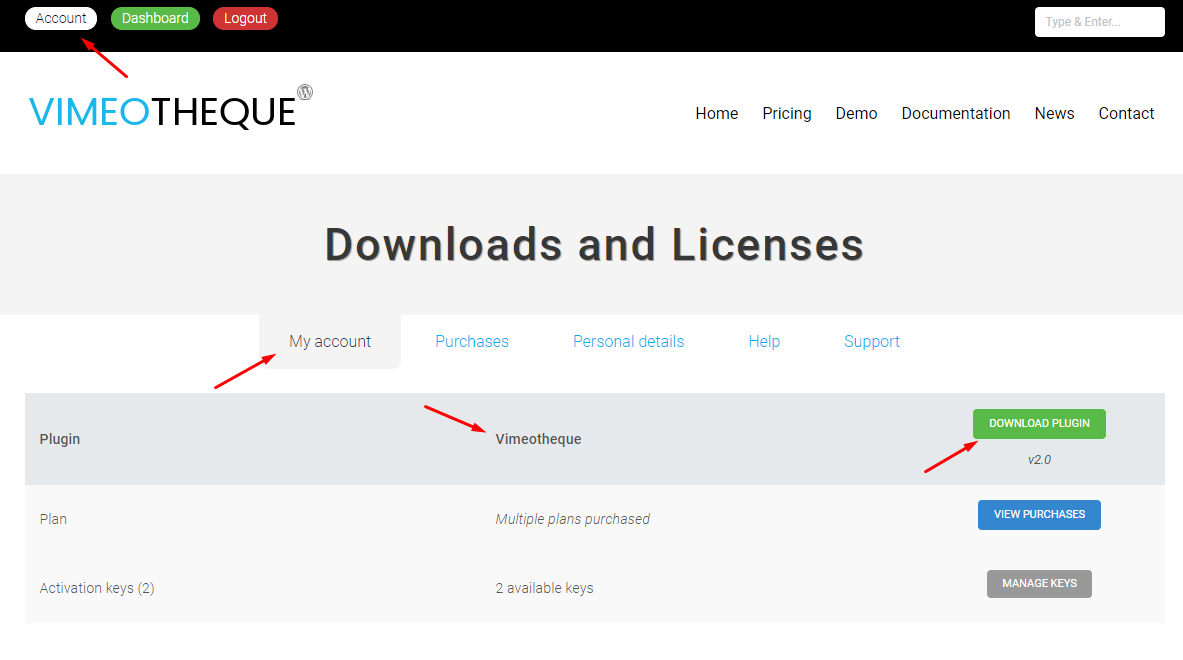
3. Both Lite and PRO versions were downloaded as zip archives; extract both archives on your computer.
4. Go to your website WP admin Plugins page and deactivate then delete Vimeotheque PRO if plugin version isn’t 2.x
5. Connect by FTP to your website and open folder “…/wp-content/plugins”
6. Upload both folders you extracted at step 3 (Vimeothe Lite 2 and Vimeotheque PRO 2).
7. Go to your website WP admin Plugins page and activate Vimeotheque Lite and Vimeotheque PRO.
